With the blazing fast technology progress it’s now easier than ever to build all kinds of interconnected gadgets, something which the corporate world might refer as IoT – Internet Of Things. For me, it’s just an excuse to spend time playing around with electronics. I’ve been installing all kinds of features into our summer cottage (or mökki, as it’s called in Finnish), so this blog post shows around some things which I’ve done.
All the things where Raspberry Pi is useful!
I’ve lost count how many Raspberry Pi’s I’ve installed. Our cottage has two of them. My home has couple. My office has at least 20 of them. My dog would probably carry one as well, but that’s another story. As Pi runs standard Linux, all the standard Linux knowledge applies, so we can run databases, GUI applications and do things with your favourite programming language.
So far I’ve found it useful to do:
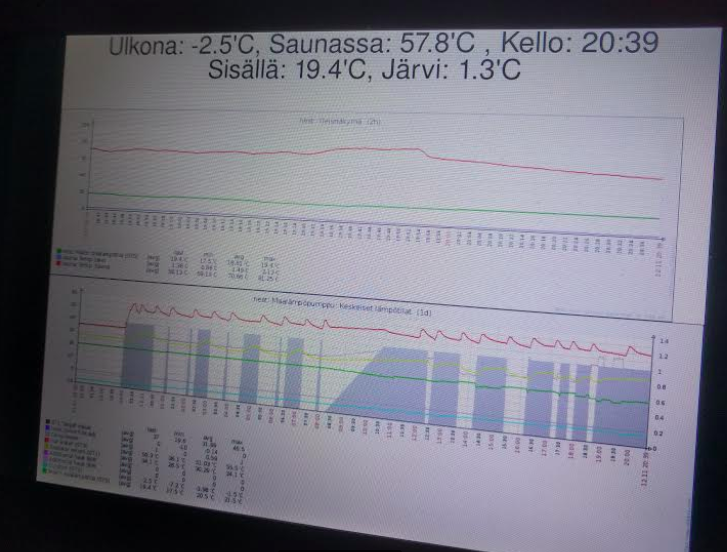
- Connect our ground heating pump (maalämpöpumppu) to a Raspberry Pi with a usb-serial cable. This gives me full telemetry and remote configuration capabilities, allowing me to save energy by keeping the cottage temperature down when I’m not there and to warm it up before I arrive.
- Work as a wifi-to-3g bridge. With a simple USB-3G dongle, an USB-WIFI dongle and a bit of standard Linux scripts you can have it to work as an access point for the Internet.
- Display dashboards. Just hook the Pi up into a TV with HDMI, run Chrome or Firefox in full screen mode and let it display whatever information best floats your boat.
- Connect DS18b20 temperature sensors. These are the legendary tiny Dallas 1-wire sensors. They look like transistors, but instead they offer digital temperature measurements from -55’C to +125’C in up to 0.5’C resolution. I have several them around, including in Sauna and in the lake. You can buy them in pre-packaged into the end of a wire or you can solder one directly to your board.
- Run full blown home automation with Home Assistant and hook it up into a wireless Z-Wave network to control your pluggable lighting, in-wall installed light switches or heating.

All the things where a Raspberry Pi is too big
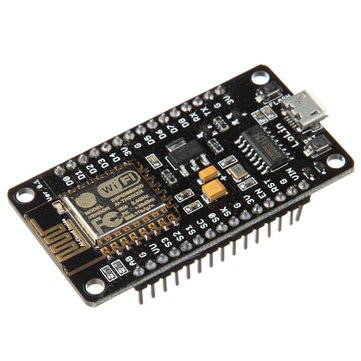
Enter Arduino and ESP8266. Since its introduction in 2005, the Arduino embedded programming ecosystem has revolutionized DIY electronics, opening the doors to build all kinds of embedded hobby systems easily. Recently a Chinese company built a chip containing full Wifi and TCP/IP stack, perfectly suitable to be paired with Arduino. So today you can buy a full WiFi capable Arduino chip (NodeMCU) for less than three euros a piece. With a bit care you can build remote sensors capable of operating under battery power for an impressive amount of time.

Using Raspberry Pi to log temperatures
The DS18b20 sensors are great. They can operate with just two wires, but it’s best to use a three wire cable: One is for ground, another is for operating power and 3rd is for data. You can put them comfortably over 30 meters away from the master (your raspberry pi) and you can have dozens of sensors in a same network as they each have a unique identifier. Reading temperature values from them is also easy as most Raspberry Pi distributions have easy-to-use drivers for them by default. The sensors are attached to the Raspberry Pi extension bus with a simple pull-down resistor. See this blog post for more info. Here’s my code to read sensor values and write the results into MQTT topics.
Using MQTT public-subscribe messaging for connecting everything together.
MQTT is a simple public-subscribe messaging system widely used for IoT applications. In this example we publish the read sensor values to different MQTT topics (for example I have nest/sauna/sauna for the temperature of sauna. I just invented that every topic in my cottage begins with “nest/”, then the “nest/sauna” means values read by the raspberry pi in the sauna building and then the last part is the sensor name).
On the other end you can have programs and devices reading values from an MQTT broker and reacting based on those values. The usual model is that each sensor publishes their current value to the MQTT bus when the value is read. If the MQTT server is down, or a device listening for the value is down, then the value is simply lost and the situation is expected to be recovered when the devices are back up. If you care for getting a complete history even during downtime, you need to build some kind of acknowledgment model, which is beyond the scope of this article.
To do this you can use mosquitto which can be installed into a recent Raspbian distribution with simply “apt-get install mosquitto”. The mosquitto_sub and mosquitto_pub programs are in the “mosquitto-clients” package.
Building a WiFi connected LCD display
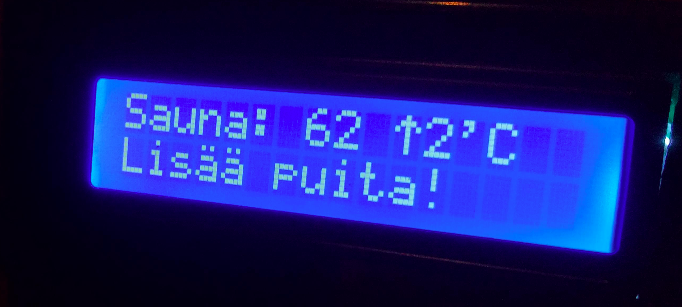
My latest project was to build a simple wifi connected LCD display to show the temperature of the Sauna and the nearby lake, and emit a buzzer beep when one needs to go and put more wood in the fireplace when the sauna is warming up.

Here’s the quick part list for the display. You can get all these from Aliexpress for around 10 euros total (be sure to filter for free shipping):
- A NodeMCU ESP8266 Arduino board from Aliexpress.
- An LCD module. I bought both 4*20 (Google for LCD 2004) and 2*16 (LCD 1602), but the boxes I ordered were big enough only for the smaller display.
- An I2C driver module for the LCD (Google for IIC/I2C / Interface LCD 1602 2004 LCD). This is used to make connecting the display to Arduino a lot easier.
- Standard USB power source and a micro-usb cable.
- A 3.3V buzzer for making the thing beep when needed.
- A resistor to limit the current for the buzzer. The value is around 200 – 800 Ohm depending on the volume you want.
Soldering the parts together is easy. The I2C module is soldered directly to the LCD board and then four wires are used to connect the LCD to the NodeMCU board. The buzzer module is connected in series with the resistor between a ground pin and a GPIO pin on the NodeMCU (this is needed to limit the current used by the buzzer. Otherwise this would fry the Arduino GPIO pin). The firmware I made is available here. Instructions on how to configure Arduino for the NodeMCU are here.
When do I need to add more wood to the stove?
One you have your sensors measuring things and devices capable acting on those measurements, you can build intelligent logic to react on different situations. In my case I wanted to have my LCD device to buzz when I need to go outside to add more wood to the sauna’s stove when I’m heating the sauna. Handling this needs some state to track the temperature history and to execute some logic to determine when to buzz. All this could be programmed into the Arduino micro-controller running the display, but modifying this requires to reprogram the device by attaching a laptop with USB to the device.
I instead opted into another way: I programmed my LCD to be stupid. It simply listens MQTT topics for orders what to display and when to buzz. Then I placed a ruby program in my raspberry pi which listens for the incoming measurements about the sauna temperature and where all the business logic is handled. Then this script will order the LCD to display current temperature, or any other message for that matter (for example the “Please add more wood” message). The source code for this is available here.
The program listens for the temperature measurements and stores them in a small ring buffer. Then on each received measurement it calculates the temperature change in the last five minutes. If the sauna is heating up and the change in the last 5min is less than two ‘C warmer, then we know that the wood is almost burned up and we need to signal the LCD to buzz. The program also has a simple state machine to determine when to do the tracking and when it needs to be quiet. The same program also formats the messages which the LCD displays.
Conclusions
You can easily build intelligent and low-cost sensors to measure pretty much any imaginable metric in a modern environment. Aliexpress is full of modules for measuring temperature, humidity, CO2 levels, flammable gases, distance, weight, magnetic fields, light, motion, vibrations and so on. Hooking them together is easy using either Raspberry Pi or an ESP8266/Arduino and you can use pretty much any language to make them act together intelligently.
Any individual part here should be simple to build and there are a lot of other blog posts, tutorials and guides all around the net (I tried to link some of them in this article). Programming an Arduino is not hard and the ecosystem has very good library for attaching all kinds of sensors into the platform. Managing a Raspberry Pi is just like managing any other Linux. When you know that things can be done then you just need some patience while you learn the details and make things work as you want.
Very interesting article, thanx. I am (also) looking for a solution to remotely monitor the temp of my outside sauna from in the home. The buzzer part, very smart, but too much for my needs. Just some home control dashboard widget would be perfect. Unfortunately I´m all new as for building this technology things myself and I would rather wish it could be bought as a ready-made package. I think many small sauna owners would be interested as the professional sauna sensors and control boards are pretty overdone and expensive.